원본출처: 티스토리 바로가기
앱을 만들다 보면 앱에 광고에 넣고 싶다. 그런데 화면에는 리사이클뷰가 들어있는데 그안에는 어떻게 넣을 것인가 ? 그것을 찾다 보니...
https://github.com/googleads/googleads-mobile-android-examples
GitHub - googleads/googleads-mobile-android-examples: googleads-mobile-android
googleads-mobile-android. Contribute to googleads/googleads-mobile-android-examples development by creating an account on GitHub.
github.com
여기 까지 찾아갔다. 그 안을 찾다보니, BannerRecyclerViewExample 이라는 프로젝트 파일을 찾을 수 있었다. 이 예제의 내용은 menu(식당에서 말하는) item 을 넣은 recycleview 에 banner 광고를 추가하는 식으로 예제를 보여 주고 있다.
물론 나도 recycleview 에 데이터를 넣은 다음 그안에 banner 광고를 추가할 생각이니 대략 다름이 없게 되는 것이다.
admob 광고를 설정하는 것은 이전 포스팅을 참고해서 하고...
https://billcorea.tistory.com/57
안드로이드 앱 만들기 도전 4일차 admob 달아 보기
오늘은 내가 만든 앱에 광고를 달아보자... admob 으로 다가... 그래서 먼저 할 꺼는 admob 에 로그인하고 앱 만들기를 클릭하기 그럼 다음 그림과 같이 나옴. 나의 앱은 안드로이드 버전이고, 아직
billcorea.tistory.com
일단 layout 에 recycleview 을 넣어 보자.
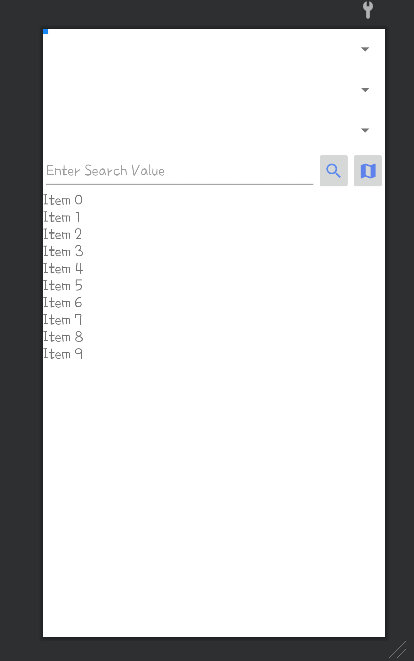
<?xml version="1.0" encoding="utf-8"?> <LinearLayout xmlns:android="http://schemas.android.com/apk/res/android" xmlns:app="http://schemas.android.com/apk/res-auto" xmlns:tools="http://schemas.android.com/tools" android:layout_width="match_parent" android:layout_height="match_parent" android:orientation="vertical" android:weightSum="30" tools:context=".MainActivity"> <LinearLayout android:id="@+id/base_progressBar" android:layout_width="match_parent" android:layout_height="match_parent" android:background="@drawable/backgroud_blueline" android:clickable="true" android:gravity="center" android:orientation="vertical" android:visibility="gone"> <TextView android:layout_width="wrap_content" android:layout_height="wrap_content" android:text="@string/msgWaitForSecond"/> <ProgressBar style="?android:attr/progressBarStyle" android:layout_width="wrap_content" android:layout_height="wrap_content" android:indeterminateDrawable="@drawable/circle_progress" android:indeterminateDuration="1000" /> </LinearLayout> <Spinner android:id="@+id/spAclass" android:layout_width="match_parent" android:layout_height="0dp" android:layout_weight="2" android:theme="@style/SpinnerTheme" /> <Spinner android:id="@+id/spBclass" android:layout_width="match_parent" android:layout_height="0dp" android:layout_weight="2" android:theme="@style/SpinnerTheme" /> <Spinner android:id="@+id/spCclass" android:layout_width="match_parent" android:layout_height="0dp" android:layout_weight="2" android:theme="@style/SpinnerTheme" /> <LinearLayout android:layout_width="match_parent" android:layout_height="0dp" android:layout_weight="2" android:orientation="horizontal" android:weightSum="10"> <EditText android:id="@+id/editSearchKey" android:layout_width="0dp" android:layout_height="match_parent" android:layout_weight="8" android:ems="10" android:hint="@string/msgSearchKey" android:inputType="textPersonName" /> <ImageButton android:id="@+id/btnSearch" android:layout_width="0dp" android:layout_height="match_parent" android:layout_weight="1" app:srcCompat="@drawable/ic_baseline_search_24" /> <ImageButton android:id="@+id/btnMaps" android:layout_width="0dp" android:layout_height="match_parent" android:layout_weight="1" app:srcCompat="@drawable/ic_baseline_map_24" /> </LinearLayout> <androidx.recyclerview.widget.RecyclerView android:id="@+id/listData" android:layout_width="match_parent" android:layout_height="0dp" android:layout_weight="22" /> </LinearLayout>이렇게 디자인된 화면을 미리 보기를 해 보면
그 다음은 recycleview 을 그려낼 화면 adapter 을 만들어 보면 다음과 같이 구현이 될 수 있다.
import android.content.Context; import android.util.Log; import android.view.LayoutInflater; import android.view.View; import android.view.ViewGroup; import android.widget.ImageView; import android.widget.TextView; import androidx.annotation.NonNull; import androidx.recyclerview.widget.RecyclerView; import com.billcoreatech.opdgang1127.MainActivity; import com.billcoreatech.opdgang1127.R; import com.billcoreatech.opdgang1127.databinding.BannerAdContainerBinding; import com.billcoreatech.opdgang1127.databinding.Jejufd6infoViewBinding; import com.google.android.gms.ads.AdView; import java.util.List; /** * {@link RecyclerAdMobAdapter} 클래스. * <p>어댑터는 {@link ViewHolder}의 항목에 대한 액세스를 제공합니다. * 또는 {@link AdViewHolder}.</p> */ public class RecyclerAdMobAdapter extends RecyclerView.Adapter<RecyclerView.ViewHolder> { // 데이터 항목 보기 유형입니다. private static final int DATA_ITEM_VIEW_TYPE = 0; // 배너 광고 보기 유형입니다. private static final int BANNER_AD_VIEW_TYPE = 1; // 활동의 컨텍스트입니다. private final Context context; // The list of banner ads and menu items. private final List<Object> recyclerViewItems; // data item layout Jejufd6infoViewBinding binding ; // banner ad layout BannerAdContainerBinding adBinding ; String TAG = "RecyclerAdMobAdapter"; /** * 이 예제 앱의 경우 recyclerViewItems 목록에는 * {@link JejuFD6infoBean} 및 {@link AdView} 유형. */ public RecyclerAdMobAdapter(Context context, List<Object> recyclerViewItems) { this.context = context; this.recyclerViewItems = recyclerViewItems; } /** * {@link ViewHolder} 클래스. * 메뉴 항목 보기의 각 보기에 대한 참조를 제공합니다. */ public class ViewHolder extends RecyclerView.ViewHolder { TextView placeName ; TextView categoryName ; TextView phone ; TextView roadAddressName ; public ViewHolder(@NonNull View itemView) { super(itemView); placeName = binding.placeName ; categoryName = binding.categoryName; phone = binding.phone; roadAddressName = binding.roadAddressName; // item click 을 활용 하기 위해서 itemView.setOnClickListener(new View.OnClickListener() { @Override public void onClick(View v) { int pos = getAdapterPosition() ; if (pos != RecyclerView.NO_POSITION) { // 리스너 객체의 메서드 호출. if (mListener != null) { mListener.onItemClick(v, pos) ; } } } }); } } /** * {@link AdViewHolder} 클래스입니다. */ public class AdViewHolder extends RecyclerView.ViewHolder { AdViewHolder(View view) { super(view); } } /** * 데이터의 갯수를 구하기 * @return */ @Override public int getItemCount() { return recyclerViewItems.size(); } /** * 주어진 위치에 대한 보기 유형을 결정합니다. * */ @Override public int getItemViewType(int position) { return (position % MainActivity.ITEMS_PER_AD == 0) ? BANNER_AD_VIEW_TYPE : DATA_ITEM_VIEW_TYPE; } /** * 메뉴 항목 보기 또는 배너 광고 보기에 대한 새 보기 만들기 * viewType을 기반으로 합니다. 이 메소드는 레이아웃 관리자에 의해 호출됩니다. */ @Override public RecyclerView.ViewHolder onCreateViewHolder(ViewGroup parent, int viewType) { switch (viewType) { case DATA_ITEM_VIEW_TYPE: RecyclerView.LayoutParams lp = new RecyclerView.LayoutParams(ViewGroup.LayoutParams.MATCH_PARENT, ViewGroup.LayoutParams.WRAP_CONTENT); binding = Jejufd6infoViewBinding.inflate((LayoutInflater) parent.getContext().getSystemService(Context.LAYOUT_INFLATER_SERVICE)); View view = binding.getRoot() ; view.setLayoutParams(lp); return new ViewHolder(view); case BANNER_AD_VIEW_TYPE: // fall through default: adBinding = BannerAdContainerBinding.inflate((LayoutInflater) parent.getContext().getSystemService(Context.LAYOUT_INFLATER_SERVICE)); View bannerLayoutView = adBinding.getRoot(); return new AdViewHolder(bannerLayoutView); } } /** * 메뉴 항목 보기를 구성하는 보기의 내용을 대체하고 * 배너 광고 보기. 이 메소드는 레이아웃 관리자에 의해 호출됩니다. */ @Override public void onBindViewHolder(RecyclerView.ViewHolder holder, int position) { int viewType = getItemViewType(position); switch (viewType) { case DATA_ITEM_VIEW_TYPE: ViewHolder viewHolder = (ViewHolder) holder; JejuFD6infoBean dataBean = (JejuFD6infoBean) recyclerViewItems.get(position); viewHolder.categoryName.setText(dataBean.getCategory_name()); viewHolder.phone.setText(dataBean.getPhone()); viewHolder.placeName.setText(dataBean.getPlace_name()); viewHolder.roadAddressName.setText(dataBean.getRoad_address_name()); break; case BANNER_AD_VIEW_TYPE: // 실패로 끝나다 default: AdViewHolder bannerHolder = (AdViewHolder) holder; AdView adView = (AdView) recyclerViewItems.get(position); ViewGroup adCardView = (ViewGroup) bannerHolder.itemView; // RecyclerView에 의해 재활용된 AdViewHolder는 다를 수 있습니다. // 이전에 이 위치에 사용된 것보다 인스턴스입니다. 지우다 // 다른 하위 보기의 AdViewHolder // AdView가 연결되어 있고 이 위치에 대한 AdView가 // 이미 다른 재활용 AdViewHolder의 상위 항목이 있습니다. if (adCardView.getChildCount() > 0) { adCardView.removeAllViews(); } if (adView.getParent() != null) { ((ViewGroup) adView.getParent()).removeView(adView); } // Add the banner ad to the ad view. adCardView.addView(adView); } } // 리스너 객체 참조를 저장하는 변수 private RecyclerAdMobAdapter.OnItemClickListener mListener = null ; // OnItemClickListener 리스너 객체 참조를 어댑터에 전달하는 메서드 public void setOnItemClickListener(RecyclerAdMobAdapter.OnItemClickListener listener) { this.mListener = listener ; } public interface OnItemClickListener { void onItemClick(View v, int position) ; } }앞에서 말했던 예제 소스에서 recycleview adapter class 을 복사해서 내가 필요한 부분으로 수정을 진행 했다.
이제까지 구현했던 adapter class 와 다른 것은 viewHolder 을 2가지로 구성해서 한가지는 화면에 보여줄 데이터가 표시되는 viewHolder 을 만들고, 또 하나는 광고 banner 가 들어가는 adViewHolder 을 구현하는 것이다.
그리고 viewType 을 이용해서 각각 뷰에 필요한 데이터를 넣어주는 방식으로 구현이 되는 것을 볼 수 있었다. 추가적으로 item 을 클릭했을 때 처리를 하기 위해서 onItemClickListener 을 구현해 주는 것이다. listview에서는 item에 onClick 리스너가 들어가서 클릭했을 때 처리를 할 수 있었으나, recycleview 에선 item 의 클릭을 인식을 구현할 수 없으므로 adapter의 onClick 리스너를 구현해서 처리를 하는 것이다.
이제 MainActivity 에서 데이터와 adBanner 을 넣는 것을 구현해 보자.
import android.annotation.SuppressLint; import android.content.Context; ..... public class MainActivity extends AppCompatActivity { // recycleview 에서 광고가 보여질 간격 public static final int ITEMS_PER_AD = 8; private static final String TAG = "MainActivity"; ActivityMainBinding binding ; Updatejejufd6infoViewBinding fd6Binding ; AppsInfoViewBinding infoViewBinding ; ArrayList<String> listSpinnerA ; ArrayList<String> listSpinnerB; ArrayList<String> listSpinnerC; DBHandler dbHandler ; ArrayList<JejuFD6infoBean> dataBeans ; JejuFD6Adapter adapter ; // 수정한 recycleview 용 adapter RecyclerAdMobAdapter recyclerAdMobAdapter ; // adapter 로 전달할 데이터 구조체 // 안에 들어가는 정보가 2가지 형식이라 object 로 선언한 것 같음. List<Object> recyclerViewItems ; SharedPreferences sp ; SharedPreferences.Editor editor ; private final long FINISH_INTERVAL_TIME = 2000; private long backPressedTime = 0; public static Context mContext ; // 광고 요청을 위해서 AdRequest adRequest ; @Override protected void onCreate(Bundle savedInstanceState) { super.onCreate(savedInstanceState); binding = ActivityMainBinding.inflate(getLayoutInflater()); setContentView(binding.getRoot()); /** * 이건 다른 class 에서 요기 있는 함수를 사용해 보기 위해서 */ mContext = this ; // 광고 초기화를 꼭 처리 해야 한다. MobileAds.initialize(this, new OnInitializationCompleteListener() { @Override public void onInitializationComplete(InitializationStatus initializationStatus) { Log.e(TAG, "adMob Ready !!!"); } }); // 광고 요청을 선언 하고. adRequest = new AdRequest.Builder().build(); // adapter 로 보낼 데이터 초기화 recyclerViewItems = new ArrayList<>(); // adapter 을 선언 recyclerAdMobAdapter = new RecyclerAdMobAdapter(MainActivity.this, recyclerViewItems); ..... // item 클릭을 했을 때 처리하기 위한 구현 부분 recyclerAdMobAdapter.setOnItemClickListener(new RecyclerAdMobAdapter.OnItemClickListener() { @Override public void onItemClick(View v, int position) { Object data = recyclerViewItems.get(position); Log.e(TAG, "pos=" + position) ; if (!data.equals(JejuFD6infoBean.class)) { JejuFD6infoBean dataBean = (JejuFD6infoBean) data; Intent intent = new Intent(MainActivity.this, MapsActivity.class); Bundle extras = new Bundle(); extras.putString("viewOption", "placePoint"); extras.putString("placeName", dataBean.getPlace_name()); extras.putString("y", dataBean.getY()); extras.putString("x", dataBean.getX()); intent.putExtras(extras); startActivityIfNeeded( intent, 100) ; } else { Log.e(TAG, "" + data.equals(JejuFD6infoBean.class)); } } }); doInfoView(); } ''''' @SuppressLint("Range") public void doInfoDataView(String categoryName) { // adapter 로 전달해 구조체를 지운다음. recyclerViewItems.clear(); dbHandler = DBHandler.open(getApplicationContext()); Cursor rs = dbHandler.selectCategoryName(categoryName); while (rs.moveToNext()) { JejuFD6infoBean dataBean = new JejuFD6infoBean(); dataBean.setPlace_name(rs.getString(rs.getColumnIndex("place_name"))); dataBean.setPhone(rs.getString(rs.getColumnIndex("phone"))); dataBean.setRoad_address_name(rs.getString(rs.getColumnIndex("road_address_name"))); dataBean.setCategory_name(rs.getString(rs.getColumnIndex("category_name"))); dataBean.setUrl(rs.getString(rs.getColumnIndex("url"))); dataBean.setY(rs.getString(rs.getColumnIndex("y"))); dataBean.setX(rs.getString(rs.getColumnIndex("x"))); // 읽어온 데이터를 adapter 용 구조체에 일단 추가 recyclerViewItems.add(dataBean); } // 광고를 추가 하는 부분들 addBannerAds(); loadBannerAds(); // recycleview 에 adapter 을 설정 binding.listData.setAdapter(recyclerAdMobAdapter); // recycleview 의 모양을 리스트형태로 설정 binding.listData.setLayoutManager(new LinearLayoutManager(getApplicationContext())); } ..... // 광고 배너를 추가 하기. private void addBannerAds() { // ITEMS_PER_AD 는 상수선언을 통해서 광고가 반복될 간격을 정한 값 for (int i = 0; i <= recyclerViewItems.size(); i += ITEMS_PER_AD) { final AdView adView = new AdView(MainActivity.this); adView.setAdSize(AdSize.BANNER); adView.setAdUnitId(getString(R.string.BANNER_ID)); recyclerViewItems.add(i, adView); } } /** * 광고를 loading */ private void loadBannerAds() { // Load the first banner ad in the items list (subsequent ads will be loaded automatically // in sequence). loadBannerAd(0); } /** * 광고를 loading */ private void loadBannerAd(final int index) { if (index >= recyclerViewItems.size()) { return; } Object item = recyclerViewItems.get(index); if (!(item instanceof AdView)) { throw new ClassCastException("Expected item at index " + index + " to be a banner ad" + " ad."); } final AdView adView = (AdView) item; // Set an AdListener on the AdView to wait for the previous banner ad // to finish loading before loading the next ad in the items list. adView.setAdListener( new AdListener() { @Override public void onAdLoaded() { super.onAdLoaded(); // The previous banner ad loaded successfully, call this method again to // load the next ad in the items list. loadBannerAd(index + ITEMS_PER_AD); } @Override public void onAdFailedToLoad(LoadAdError loadAdError) { // The previous banner ad failed to load. Call this method again to load // the next ad in the items list. String error = String.format( "domain: %s, code: %d, message: %s", loadAdError.getDomain(), loadAdError.getCode(), loadAdError.getMessage()); Log.e( "MainActivity", "The previous banner ad failed to load with error: " + error + ". Attempting to" + " load the next banner ad in the items list."); loadBannerAd(index + ITEMS_PER_AD); } }); // Load the banner ad. adView.loadAd(new AdRequest.Builder().build()); } }앞에서 말한 예제 소스에서 필요한 부분만 내가 만든 MainActivity 에 추가해 보았다. 이해를 하면 쉬워 보이기는 하는데, 일단 항목을 넣을 list 을 하다 선언하고 그 안에 데이터를 먼저 채운 다음 광고를 중간에 삽입 하는 그런 형식으로 추가가 되는 것으로 이해가 되었다. 실제 동작을 시켜 봐도 그렇게 이해가 될 수 있을 것 같다.
실행해 보니 대충 이해가 되는 모양이 되었다. 이것으로 또 하나 배움(?)을 전하며...
댓글
댓글 쓰기