2026/02/16

오늘의 이야기


앱을 만들었으니 이번에는 플레이 스토어에 등록을 해 보자  등록을 하려면 먼저 개발자 계정으로 사용자 등록을 진행해야 한다.


https://play.google.com/console/signup


Google Play Developer Console


하나의 계정으로 모든 Google 서비스를 Google Play Developer Console로 이동하려면 로그인하세요.


accounts.google.com


앱을 등록하려면 개발자 계정을 먼저 생성해야 한다.  


개발자 이름,  이메일 주소 , 연락처 전화번호 등등을 입력하고 약관은 체크를 하고 진행 해야 한다.  요새는 워낙 세상이 흉흉하니 가급적이면 구글계정으로 이메일 계정을 하나 만들어 사용하는 것이 좋지 않을 까 하는 생각을 했다.  개인적으로 사용하지 않는 일하는 계정이 좋을 듯 하고, 전화번호도 가급적이면 개인폰 번호 보다는 안심번호를 얻어서 사용하는 것이 좋을 것 같다.   안심번호를 얻는 방법은 크몽 사이트에서 개발자로 등록하면 안심번호가 부여 된다. 


https://kmong.com/


프리랜서마켓 No.1 크몽 | 디자인, IT·프로그래밍, 마케팅,번역·통역, 경영진단, 법률 및 취업 관


블로그·카페, 로고·브랜딩, 웹사이트 개발 등 25만명+의 전문가 중에서 나만을 위한 전문가를 리뷰, 포트폴리오, 실시간 견적과 함께 크몽에서 만나보세요


kmong.com


계정 생성 및 결제를 클릭해서 진행하면 $25을 결제해야 개발자 계정을 등록할 수 있다.


앱 만들기 버튼을 클릭해서 다음으로 넘어간다.


앱 만들기를 클릭해서 기본사항을 입력하고 나면, 다음은 앱 설정 시작에서 앱 등록 자료를 입력 해야 한다.


테스트 시작을 통해서 내부테스트/ 공개테스트 / 비공개 테스트 등을 선택할 수 있다. 바로 앱 등록을 할 수 도 있지만, 


테스트를 먼저 진행하게 되면 출시점 점검사항을 미리 확인해 볼 수 있다.


우리는 그냥 등록을 시작해 본다.


해야할 일들을 순서대로 보여주기 떄문에 하나씩 클릭해서 진행하면 된다.


https://play.google.com/store/apps/details?id=com.billcoreatech.ontheway801 


가는길에 (On The Way) - Google Play 앱


선택한 위치에 도착하면 사전에 등록한 알림을 보내 줍니다.


play.google.com


등록하고 기다리면 위 링크와 같이 playstore 에 등록된 나의 앱을 볼 수 있게 된다.'


끝.


반응형


오늘의 이야기


오늘은 내가 만든 앱에 광고를 달아보자... admob 으로 다가... 그래서 먼저 할 꺼는 admob 에 로그인하고 앱 만들기를 클릭하기


그럼 다음 그림과 같이 나옴.  


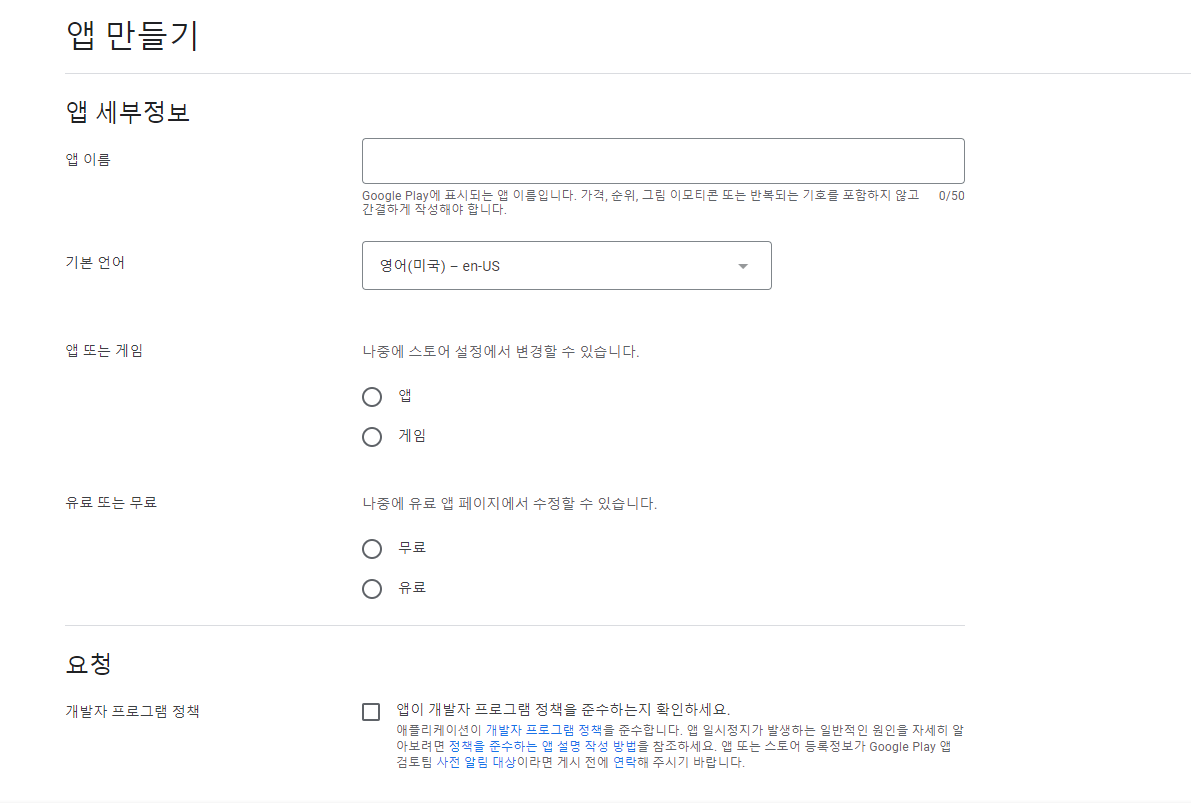
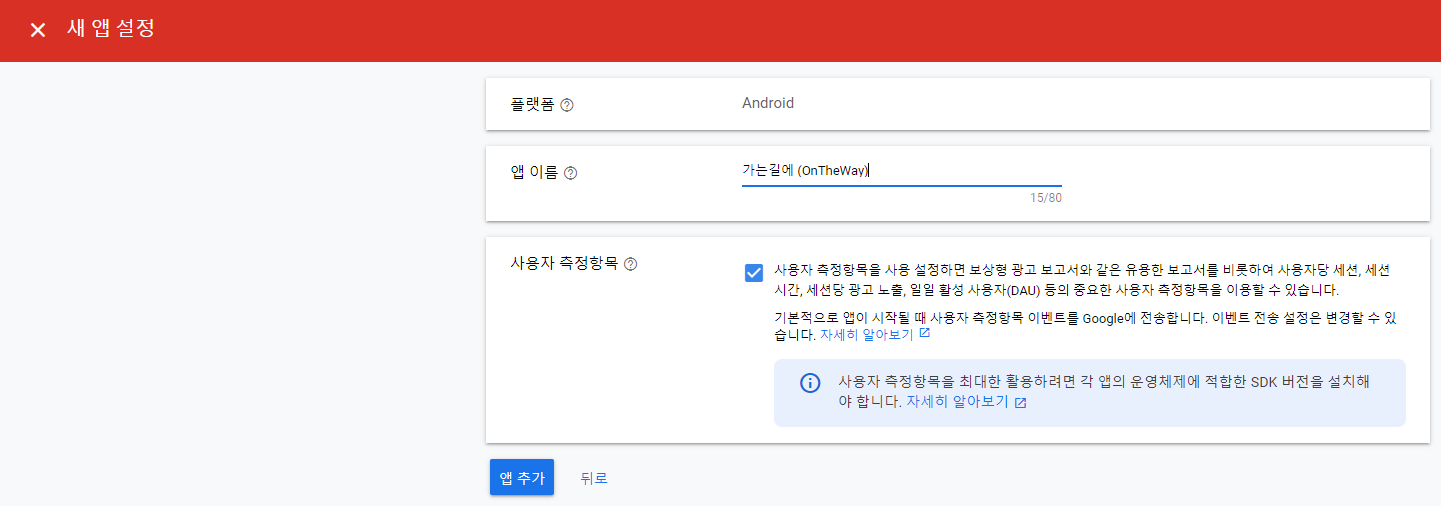
나의 앱은 안드로이드 버전이고, 아직 스토어에 등록이 되지 않았다고 선택 - 그리고 계속 하기... 그전에 앱을 스토어에 등록하고 나서 승인도 받아야 정상적으로 광고가 게시될 것 같으니,  그전까지는 테스트 광고만 게시하는 것으로 해야 할 것 같음.  계속을 클릭 하면 다음과 같이 나옴.


앱 이름을 입력하고 - 앱 추가 버튼 클릭 


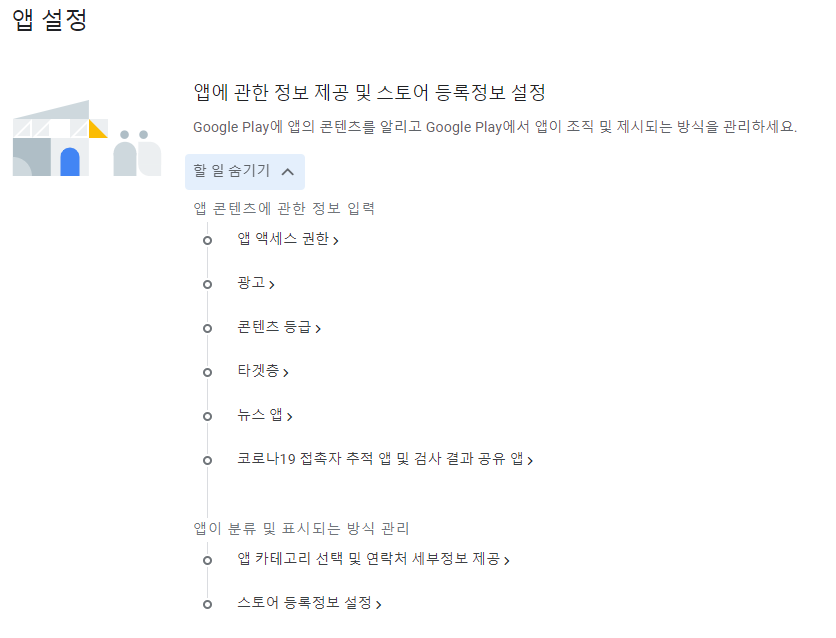
등록이 되었다네요... 그럼 이제 뭘 해야 하지...  일단 광고 단위를 추가해야 한다. 그래야 앱이 광고를 실행할 수 있으니까.


종류가 많기도 해라... 아무튼 오늘은 처음이니 배너 광고를 선택하고 진행을 해 볼 예정이다.


광고단위 만들기 버튼을 클릭하면 다음과 같이 App ID 와 banner ID 가 나타난다.


위에서 보여주는 ca... 로 되어 있는 것들을 일단, 내 프로젝트의 strings.xml 에 추가 하자.  위에 있는 것은 (내용중에 ~ 표시가 있다) AppId 에 넣고, 아래 꺼(내용중에 / 표시가 있음)는 bannerId 에 넣어준다. 그리고 테스트를 위해서 testId 을 추가한다.


    <string name="AppId" translatable="false">ca-app-p...............589257</string>
<string name="bannerId" translatable="false">ca-app................96255890</string>
<string name="testId" translatable="false">ca-app-pub-3940256099942544/6300978111</string>


그 다음은 SDK 가이드를 보라고 하는데,  들여다 보면 다음과 같다. 앱 수준 gradle 파일에 다음을 추가해야 한다.


dependencies {

.....

implementation 'com.google.android.gms:play-services-ads:20.3.0'

}

광고게시를 위해서 필요한 라이브러리를 받을 수 있도록 추가 하여 화면 상단에 sync 을 클릭해서 필요한 라이브러리를 받아온다.


이번에는 manifests.xml 에 다음과 같이 추가 한다.  meta-data 을 추가 한다.  value 에 들어가는 AppId 는 위에서 말한 strings.xml 에 저장한 name 과 같아야 한다.


    <application
android:allowBackup="true"
android:icon="@mipmap/ic_locationnote"
android:label="@string/app_name"
android:roundIcon="@mipmap/ic_locationnote_round"
android:supportsRtl="true"
android:theme="@style/Theme.On801"
android:usesCleartextTraffic="true">

<meta-data
android:name="com.google.android.gms.ads.APPLICATION_ID"
android:value="@string/AppId"/>

.....

</application>

 이번에는 activity_main.xml 화면 layout 에 뷰를 달아 주어야 한다.


    <com.google.android.gms.ads.AdView
android:id="@+id/adView"
android:layout_width="match_parent"
android:layout_height="wrap_content"
android:layout_alignParentBottom="true"
android:layout_centerHorizontal="true"
android:layout_weight="1"
app:adSize="BANNER"
app:adUnitId="@string/testId"></com.google.android.gms.ads.AdView>

아직은 우리의 앱이 스토어에 등록이 되지 않았기 때문에 adUnitId 에는 위에서 저장한 testId 을 이용해서 테스트를 진행해야 한다.  구글은 광고가 들어간 앱을 작성자가 클릭하는 것을 싫어하고 제재를 할 수 있기 때문에 테스트 단계에서는 반드시 testId을 사용할 것을 권고하고 있다.   이번에는 MainActivity 에서 아래와 같이 광고를 게재 하면 된다.


    @Override
protected void onCreate(Bundle savedInstanceState) {
super.onCreate(savedInstanceState);
binding = MainActivityBinding.inflate(getLayoutInflater());
setContentView(binding.getRoot());

MobileAds.initialize(this, new OnInitializationCompleteListener() {
@Override
public void onInitializationComplete(InitializationStatus initializationStatus) {
}
});

AdRequest adRequest = new AdRequest.Builder().build();
binding.adView.loadAd(adRequest);
}


 이것으로 우리의 앱에 광고를 다는 것도 완성 !!!


광고종류에 따라 다양하게 앱의 화면을 구성해야 하는 것은 아무래도


남은 숙제일 것 같다.


이제 다음번에는 스토어에 등록하는 과정을 담아 보도록 하겠다.


반응형


오늘의 이야기


#스하리1000명프로젝트,
Bazen yabancı işçilerle konuşmak zor oluyor, değil mi?
Yardımcı olacak basit bir uygulama yaptım! Siz kendi dilinizde yazarsınız ve başkaları da bunu kendi dillerinde görür.
Ayarlara göre otomatik çeviri yapar.
Kolay sohbetler için son derece kullanışlı. Fırsat bulduğunda bir göz at!
https://play.google.com/store/apps/details?id=com.billcoreatech.multichat416


오늘의 이야기


3일차는 쫌 그렇게 3번쨰 글 쓰기... 그 사이에 몇날이 흘렀다.   먼저 만들어진 앱을 볼까 ?


geofence 는 실행을 등록하면 유효시간을 정하게 되어 있어서


등록할 때 특정 시간을 지정할 수 있도록 선언을 해 주어야 한다.


mGeofenceList.add(new Geofence.Builder()
.setRequestId(mapPOIItem.getItemName() + ":" + keywordBinding.editKeyword.getText().toString())
.setCircularRegion(
mapPoint.getMapPointGeoCoord().latitude,
mapPoint.getMapPointGeoCoord().longitude,
spSetting.getInt("aroundArea", (int) Constants.GEOFENCE_RADIUS_IN_METERS)
)
.setExpirationDuration(StringUtils.getDuration(context))
.setTransitionTypes(Geofence.GEOFENCE_TRANSITION_ENTER |
Geofence.GEOFENCE_TRANSITION_EXIT)
.build());


geofencelist 에 항목을 추가하면서 parameter 로 유지 시간을 설정할 수 있으므로 샘플 소스와 같이 등록 할 때 유지 시간을 설정한다.


setCircularRegion(위도, 경도, 범위) 를 지정하고


setExpirationDuration(유지시간) 을 입력한다. 유지시간은 ms 단위로 입력을 해야 하기 때문에 12 * 60 * 60 * 1000 으로 입력을 해야 12시간이 유지 된다.


이번에는 지도 보이기, 여기서는 지도를 kakao api 을 이용해서 지도를 표현하고 있으니,   지도 연동은 아래글을 참고 해서 보시길...


https://billcorea.tistory.com/23


주변 검색을 하는 방법은 


https://billcorea.tistory.com/48


이글을 참고해서 보시면 될 것 같다.


android geofences 을 활용한 앱 만들기 2일차.


앞에 이야기를 보고 준비를 잘 했다면 이제 하나씩 만들어 보자. 카카오 지도 준비는 되었으니, 이제 카카오 개발자 페이지에서 주변 정보를 수집할 방법에 대하여 생각해 보자, 구글에서도 place


billcorea.tistory.com


Kakao 지도 연동...


몇해전에는 카카오 지도를 연동하는 데, 애로 사항을 많이 느꼈다. 카카오의 기술지원은 어디에 있는 것인지 찾을 수 도 없고... 이번에 다시금 도전~ apis.map.kakao.com/android/ 이 페이지는 예나 지금


billcorea.tistory.com


다음에 해야할 일은 play store 에 등록하는 것이 될 것 같다.  그 전에 google admob 을 이용해서 앱에 광고를 달아보는 절차를 진행해 볼 생각이다.


동영상은 logcat 에서 만들어낸 동영상파일을 하나로 묶어서 너튜브에 게시함,  그러는 이유는 나중에 앱을 등록하는 과정에서 앱의 사용설명서로 링크 하기 위해서... 그리고 이 페이지로 이동하는 링크를 달아 두기 위해서.


반응형


오늘의 이야기


Android 스튜디오: 절전 모드


Android Studio: 절전 모드는 Android 스튜디오 절전 모드입니다. 코드를 연 후 자동으로 프롬프트가 표시되지 않고 어떤 클래스와 메서드가 참조되는지 직관적이지 않으며 코드 자체 검사가 적용되지 않습니다.


인터넷을 찾다가 발견한 설명이다. 


이걸 체크 하면 불편한 점...  코드 입력시 auto coding 을 지원 하지 않는다.  이것이 제일 불편하다고 할 수 있을 것 같다.


반응형


오늘의 이야기


#billcorea #운동동아리관리앱
🏸 Schneedle, badminton kulüplerinin olmazsa olmaz uygulaması!
👉 Maç Oyunu - Skorları Kaydedin ve Rakipleri Bulun 🎉
Tek başınıza, arkadaşlarınızla veya bir kulüpte her yerde mükemmel! 🤝
Badmintonu seviyorsanız mutlaka deneyin

Uygulamaya git 👉 https://play.google.com/store/apps/details?id=com.billcorea.matchplay


오늘의 이야기


https://medium.com/nybles/sending-push-notifications-by-using-firebase-cloud-messaging-249aa34f4f4c


Sending Push Notifications by Using Firebase Cloud Messaging


Ever wondered how does your smartphone receive and handle notifications whether be in foreground, background or even killed?


medium.com


앱을 만들꺼다... 저번에 하던 geofences 관련된 앱도 만들고 있는 중이고, 진척이 더디다... 그래도 만들꺼다. 이번에는 FCM 을 이용해서   message  push 을 해 보고자 한다. 


다수의 사용자에게 또는 특정 사용자에게 메시지 전송을 하고 싶다.   FCM 의 문서를 읽어보면 서버 구성을 할 수 있으면 좋을 것 같다. 그러나 일반적인 사용자에게는 서버가 있을턱은 없고. 그럼 그냥 앱에서 그것들을 구현해 보는 것이다. 


그럼 어떻게 할 것 인가 ?


https://stackoverflow.com/questions/37576705/firebase-java-server-to-send-push-notification-to-all-devices 


Firebase Java Server to send push notification to all devices


I am trying to send a Push notification to my android device with the new Firebase service. I registered and setup an app, also I put all the code needed to receive notification in the android app....


stackoverflow.com


어떤 주제를 가지고 공통의견을 가지는 사람들에게 알림을 보내는 방법.  일단 그 방법을 적용해 보기로 했다.


클라이언트 앱에서는 topic 을 2개 수신 등록을 해 두고 서버앱에서는 topic 을 이용해서 클라이언트 앱으로 메시지를 push 해 보는 것이다.


다수의 시간을 소비해 가면서 찾은 것들을 정리해 둠... 이런 저런 검색들 끝에 찾은건... 문서을 잘 읽어 보자. 그리고 서버가 없는 나는 어떻게 할 것 인가 ? 그것에 대한 고민을 해 보자. ㅠㅠ


아래 소스는 오늘 저녁 4시간 가량을 소비해 가면서 구글링 한 결과 얻은 소스을 일부 수정했다. android apps 에서 사용할 수 있도록 


저 class 을 따로 하나 만들어서 내가 사용하고 싶은 곳에서 호출해서 사용하면 된다.


import android.content.Context;
import android.content.res.AssetFileDescriptor;
import android.content.res.AssetManager;

import com.google.auth.oauth2.GoogleCredentials;
import com.google.gson.Gson;
import com.google.gson.GsonBuilder;
import com.google.gson.JsonObject;
import java.io.FileInputStream;
import java.io.IOException;
import java.io.InputStream;
import java.io.OutputStreamWriter;
import java.net.HttpURLConnection;
import java.net.URL;
import java.util.Arrays;
import java.util.Scanner;

/**
* Firebase Cloud Messaging (FCM) can be used to send messages to clients on iOS, Android and Web.
*
* This sample uses FCM to send two types of messages to clients that are subscribed to the `news`
* topic. One type of message is a simple notification message (display message). The other is
* a notification message (display notification) with platform specific customizations, for example,
* a badge is added to messages that are sent to iOS devices.
*/
public class Messaging {

private static final String PROJECT_ID = "my-appl0fb";
private static final String BASE_URL = "https://fcm.googleapis.com";
private static final String FCM_SEND_ENDPOINT = "/v1/projects/" + PROJECT_ID + "/messages:send";

private static final String MESSAGING_SCOPE = "https://www.googleapis.com/auth/firebase.messaging";
private static final String[] SCOPES = { MESSAGING_SCOPE };

private static final String TITLE = "FCM Notification";
private static final String BODY = "Notification from FCM";
public static final String MESSAGE_KEY = "message";

public Messaging() {

}

/**
* Retrieve a valid access token that can be use to authorize requests to the FCM REST
* API.
*
* @return Access token.
* @throws IOException
*/
// [START retrieve_access_token]
public String getAccessToken(Context context) throws IOException {

AssetManager assetManager = context.getAssets();
AssetFileDescriptor fileDescriptor = assetManager.openFd("my-ap0fb.json");
FileInputStream fileInputStream = fileDescriptor.createInputStream();

GoogleCredentials googleCredentials = GoogleCredentials
.fromStream(fileInputStream)
.createScoped(Arrays.asList(SCOPES));
// googleCredentials.refreshAccessToken().getTokenValue();
return googleCredentials.refreshAccessToken().getTokenValue();
}
// [END retrieve_access_token]

/**
* Create HttpURLConnection that can be used for both retrieving and publishing.
*
* @return Base HttpURLConnection.
* @throws IOException
*/
public HttpURLConnection getConnection(Context context) throws IOException {
// [START use_access_token]
URL url = new URL(BASE_URL + FCM_SEND_ENDPOINT);
HttpURLConnection httpURLConnection = (HttpURLConnection) url.openConnection();
httpURLConnection.setRequestProperty("Authorization", "Bearer " + getAccessToken(context));
httpURLConnection.setRequestProperty("Content-Type", "application/json; UTF-8");
return httpURLConnection;
// [END use_access_token]
}

/**
* Send request to FCM message using HTTP.
* Encoded with UTF-8 and support special characters.
*
* @param fcmMessage Body of the HTTP request.
* @throws IOException
*/
public void sendMessage(JsonObject fcmMessage, Context context) throws IOException {
HttpURLConnection connection = getConnection(context);
connection.setDoOutput(true);
OutputStreamWriter writer = new OutputStreamWriter(connection.getOutputStream(), "UTF-8");
writer.write(fcmMessage.toString());
writer.flush();
writer.close();

int responseCode = connection.getResponseCode();
if (responseCode == 200) {
String response = inputstreamToString(connection.getInputStream());
System.out.println("Message sent to Firebase for delivery, response:");
System.out.println(response);
} else {
System.out.println("Unable to send message to Firebase:");
String response = inputstreamToString(connection.getErrorStream());
System.out.println(response);
}
}

/**
* Send a message that uses the common FCM fields to send a notification message to all
* platforms. Also platform specific overrides are used to customize how the message is
* received on Android and iOS.
*
* @throws IOException
*/
public void sendOverrideMessage(Context context) throws IOException {
JsonObject overrideMessage = buildOverrideMessage();
System.out.println("FCM request body for override message:");
prettyPrint(overrideMessage);
sendMessage(overrideMessage, context);
}

/**
* Build the body of an FCM request. This body defines the common notification object
* as well as platform specific customizations using the android and apns objects.
*
* @return JSON representation of the FCM request body.
*/
public JsonObject buildOverrideMessage() {
JsonObject jNotificationMessage = buildNotificationMessage();

JsonObject messagePayload = jNotificationMessage.get(MESSAGE_KEY).getAsJsonObject();
messagePayload.add("android", buildAndroidOverridePayload());

JsonObject apnsPayload = new JsonObject();
apnsPayload.add("headers", buildApnsHeadersOverridePayload());
apnsPayload.add("payload", buildApsOverridePayload());

messagePayload.add("apns", apnsPayload);

jNotificationMessage.add(MESSAGE_KEY, messagePayload);

return jNotificationMessage;
}

/**
* Build the android payload that will customize how a message is received on Android.
*
* @return android payload of an FCM request.
*/
public JsonObject buildAndroidOverridePayload() {
JsonObject androidNotification = new JsonObject();
androidNotification.addProperty("click_action", "android.intent.action.MAIN");

JsonObject androidNotificationPayload = new JsonObject();
androidNotificationPayload.add("notification", androidNotification);

return androidNotificationPayload;
}

/**
* Build the apns payload that will customize how a message is received on iOS.
*
* @return apns payload of an FCM request.
*/
public JsonObject buildApnsHeadersOverridePayload() {
JsonObject apnsHeaders = new JsonObject();
apnsHeaders.addProperty("apns-priority", "10");

return apnsHeaders;
}

/**
* Build aps payload that will add a badge field to the message being sent to
* iOS devices.
*
* @return JSON object with aps payload defined.
*/
public JsonObject buildApsOverridePayload() {
JsonObject badgePayload = new JsonObject();
badgePayload.addProperty("badge", 1);

JsonObject apsPayload = new JsonObject();
apsPayload.add("aps", badgePayload);

return apsPayload;
}

/**
* Send notification message to FCM for delivery to registered devices.
*
* @throws IOException
*/
public void sendCommonMessage(Context context) throws IOException {
JsonObject notificationMessage = buildNotificationMessage();
System.out.println("FCM request body for message using common notification object:");
prettyPrint(notificationMessage);
sendMessage(notificationMessage, context);
}

/**
* Construct the body of a notification message request.
*
* @return JSON of notification message.
*/
public JsonObject buildNotificationMessage() {
JsonObject jNotification = new JsonObject();
jNotification.addProperty("title", TITLE);
jNotification.addProperty("body", BODY);

JsonObject jMessage = new JsonObject();
jMessage.add("notification", jNotification);
jMessage.addProperty("topic", "allDevices");

JsonObject jFcm = new JsonObject();
jFcm.add(MESSAGE_KEY, jMessage);

return jFcm;
}

/**
* Read contents of InputStream into String.
*
* @param inputStream InputStream to read.
* @return String containing contents of InputStream.
* @throws IOException
*/
public String inputstreamToString(InputStream inputStream) throws IOException {
StringBuilder stringBuilder = new StringBuilder();
Scanner scanner = new Scanner(inputStream);
while (scanner.hasNext()) {
stringBuilder.append(scanner.nextLine());
}
return stringBuilder.toString();
}

/**
* Pretty print a JsonObject.
*
* @param jsonObject JsonObject to pretty print.
*/
public void prettyPrint(JsonObject jsonObject) {
Gson gson = new GsonBuilder().setPrettyPrinting().create();
System.out.println(gson.toJson(jsonObject) + "\n");
}

/*
public static void main(String[] args) throws IOException {
if (args.length == 1 && args[0].equals("common-message")) {
sendCommonMessage();
} else if (args.length == 1 && args[0].equals("override-message")) {
sendOverrideMessage();
} else {
System.err.println("Invalid command. Please use one of the following commands:");
// To send a simple notification message that is sent to all platforms using the common
// fields.
System.err.println("./gradlew run -Pmessage=common-message");
// To send a simple notification message to all platforms using the common fields as well as
// applying platform specific overrides.
System.err.println("./gradlew run -Pmessage=override-message");
}
}
*/

}

소스의 내용중에 main 함수는 막았다. 왜냐면 android 내에서는 호출할 일이 없으니까. 다만 원래 있던 부분이니 혹시나 서버용으로 구성을 하는 경우 필요할 듯 하여...


이제 앱 수준의 gradle 파일에 추가를 해야 한다.


plugins {
id 'com.android.application'
id 'com.google.gms.google-services'
}

android {
compileSdk 30

buildFeatures {
viewBinding true
}

packagingOptions {
exclude 'META-INF/DEPENDENCIES'
exclude 'META-INF/LICENSE'
exclude 'META-INF/LICENSE.txt'
exclude 'META-INF/license.txt'
exclude 'META-INF/NOTICE'
exclude 'META-INF/NOTICE.txt'
exclude 'META-INF/INDEX.LIST'
exclude 'META-INF/notice.txt'
exclude 'META-INF/ASL2.0'
}

aaptOptions {
noCompress "json"
}

}

dependencies {

implementation 'com.google.auth:google-auth-library-oauth2-http:1.0.0'

implementation platform('com.google.firebase:firebase-bom:28.2.1')
implementation 'com.google.firebase:firebase-messaging'
implementation 'com.google.firebase:firebase-analytics'

}

원래는 다른 것들도 많이 있지만, 이것들은 꼭 필요한 듯 하여...


aaptOptions 는 사용법이 파일 확장자를 등록하는 것인데, assets 폴더에 json 파일을 넣어주고 그걸 읽어오게 하려고 했더니 file not found 오류가 나서 찾다가 압축을 하지 않도록 설정하는 것이란다. 그래야 제대로 파일을 읽어올 수 있다고


그 assets 폴더에 들어가야 하는 파일은 인증을 시도하기 위해서 저장해야 하는 파일인데, 이건 messaging class 에 보면 getAccessToken 함수에서 사용하고 있으니 거길 보시면 되고 거기에 보면 openFd() 에 파일이름이 있는데, 원래 이름은 내려받은 파일 이름으로 작성하시면 됨 이파일은 


firebase console 에서 해당 프로젝트 설정 의 서비스 계정에 보면 새 비공개 키생성 이라고 있는데, 요기를 클릭하면 내려주는 json 파일인데, 이걸 받아서 이름을 변경하여 저장한 것을 내 프로젝트의 폴더에 담았다.


위치는 아래 그림 처럼 내 프로젝트 app/src/main/assets 폴더에 다가...


이제 준비는 된 것 같으니... MainActivity 에 호출하는 함수를 구현해 본다.


        new Thread() {
@Override
public void run() {
super.run();
try {

Messaging messaging = new Messaging(getApplicationContext());
messaging.sendCommonMessage(getApplicationContext());

} catch (Exception e) {
e.printStackTrace();
}

}
}.start();

thread 을 사용하는 건 아시겠지만, android 가 http 통신을 하기 위해서는 비동기식으로 처리를 해야만 오류가 발생하지 않기 때문에 이렇게 처리를 하는 것이다.


혹시나 여기 까지를 했는데, 앱에서 수신을 하지 않는다면... Messaging 소스에서 topic 이라는 단어를 찾어 보시길, 이걸 설정하는 이유는 메시지 수신할 경우를 지정하기 위해서 인데, 앱에서 특정한 방법으로 메시지를 전송하려면 구현을 이런 방식으로 해 두는 것이 좋을 것 같기도 하고.  암튼 저 메시지가 수신되는 것으로 확인하고 싶으면 topic 을 먼저 구독 독 하도록 설정해야 하는데, 그건


        FirebaseMessaging.getInstance().subscribeToTopic("allDevices")
.addOnCompleteListener(new OnCompleteListener<Void>() {
@Override
public void onComplete(@NonNull Task<Void> task) {
Log.e(TAG, "allDevices subscribed ..." );
}
});

MainActivity 의 onCreate 어딘가 쯤 위 코드를 넣어주면 앱이 시작 되면서 구독할 준비가 된다.


앱에서 메시지 수신에 대한 설명은 문서를 참조하여 작성하시길.  그건 아래 링크를 참조하시도록 남겨 놓는다.


https://firebase.google.com/docs/cloud-messaging/android/receive?authuser=0 


Android 앱에서 메시지 수신  |  Firebase


Firebase 알림의 동작은 수신하는 앱의 포그라운드/백그라운드 상태에 따라 달라집니다. 포그라운드 상태인 앱에서 알림 메시지 또는 데이터 메시지를 수신하려면 onMessageReceived 콜백을 처리하는


firebase.google.com


FCM 의 수신을 하는 경우 봐 두어야 하는 부분이 앱이 backgound 상태인 경우와 foreground 상태 메시지가 도달 했을 때 처리 되는 기준이 좀 다르다는 것을 알게 되었다. 위 링크에서 일부 설명은 되어 있지만 친절하게 설명이 되어 있지 않기 때문에 조금 준비를 하는 데 시간이 좀 필요하게 되었다. 


먼저 foreground 에서 수신 하는 경우에는  위 문서에서도 설명하고 있는 FirebaseMessagingService 에 onMessageReceived 을 통해 수신 되는 메시지를 이용해서 바로 보여 줄 수 있도록 구현을 하면 되었고,


@Override
public void onMessageReceived(RemoteMessage remoteMessage) {

// TODO(developer): Handle FCM messages here.
// Not getting messages here? See why this may be: https://goo.gl/39bRNJ
Log.e(TAG, "From: " + remoteMessage.getFrom());

// Check if message contains a data payload.
if (remoteMessage.getData().size() > 0) {
Log.e(TAG, "Message data payload: " + remoteMessage.getData());

sp = getSharedPreferences(getPackageName(), MODE_PRIVATE);
editor = sp.edit() ;

Map<String, String> strMap = remoteMessage.getData();
Log.e(TAG, "URL=" + strMap.get("URL"));
Log.e(TAG, "BODY=" + strMap.get("BODY"));

editor.putString("URL", strMap.get("URL").contains("http") ? strMap.get("URL") : "https://" + strMap.get("URL"));
editor.putString("BODY", strMap.get("BODY"));
editor.putBoolean("FcmTy", true) ;
editor.commit();

handleNow();

}

// Check if message contains a notification payload.
if (remoteMessage.getNotification() != null) {
Log.e(TAG, "Message Notification Body: " + remoteMessage.getNotification().getBody());
sendNotification(remoteMessage.getNotification().getBody()) ;
}

onDeletedMessages();
}

private void handleNow() {

Log.d(TAG, "Short lived task is done.");
Intent intent = new Intent(FcmReceiveService.this, ViewActivity.class);
intent.addFlags(Intent.FLAG_ACTIVITY_NEW_TASK);
startActivity(intent);

}


background 상태일 때는 앱의 시스템 알림으로 notify 을 하게 되는데, FirebaseMessagingService 에서는 아래 코드 처럼 notification 을 구현하게 되어 시스템 알림이 뜨게 된다 이  떄 알림을 클릭하면 


private void sendNotification(String messageBody) {
Intent intent = new Intent(this, MainActivity.class);
intent.addFlags(Intent.FLAG_ACTIVITY_CLEAR_TOP);
PendingIntent pendingIntent = PendingIntent.getActivity(this, 0 /* Request code */, intent,
PendingIntent.FLAG_ONE_SHOT);

NotificationManager notificationManager =
(NotificationManager) getSystemService(Context.NOTIFICATION_SERVICE);

String channelId = getString(R.string.default_notification_channel_id);
CharSequence channelName = getString(R.string.default_notification_channel_name);
int importance = NotificationManager.IMPORTANCE_LOW;
NotificationChannel notificationChannel = new NotificationChannel(channelId, channelName, importance);
notificationChannel.enableLights(true);
notificationChannel.setLightColor(Color.BLUE);
notificationChannel.enableVibration(true);
notificationChannel.setVibrationPattern(new long[]{100, 200, 300, 400, 500, 400, 300, 200, 400});
notificationManager.createNotificationChannel(notificationChannel);

Uri defaultSoundUri = RingtoneManager.getDefaultUri(RingtoneManager.TYPE_NOTIFICATION);
NotificationCompat.Builder notificationBuilder =
new NotificationCompat.Builder(this, channelId)
.setSmallIcon(R.drawable.ic_launcher_foreground)
.setContentTitle(getString(R.string.fcm_message))
.setContentText(messageBody)
.setAutoCancel(true)
.setSound(defaultSoundUri)
.setContentIntent(pendingIntent);

// Since android Oreo notification channel is needed.
if (Build.VERSION.SDK_INT >= Build.VERSION_CODES.O) {
NotificationChannel channel = new NotificationChannel(channelId,
"Channel human readable title",
NotificationManager.IMPORTANCE_DEFAULT);
notificationManager.createNotificationChannel(channel);
}

notificationManager.notify(0 /* ID of notification */, notificationBuilder.build());
}


문서에 기술된 것 처럼 LAUNCHER activity 를 호출 하도록 되어 있다.


백그라운드 앱에서 알림 메시지 처리
앱이 백그라운드 상태이면 Android에서 알림 메시지를 작업 표시줄로 전송합니다. 사용자가 알림을 탭하면 기본적으로 앱 런처가 열립니다.

여기에는 알림과 데이터 페이로드가 모두 들어 있는 메시지 및 알림 콘솔에서 보낸 모든 메시지가 포함됩니다. 이러한 경우 알림은 기기의 작업 표시줄로 전송되고 데이터 페이로드는 런처 활동의 인텐트 부가 정보로 전송됩니다.

앱으로 전송된 메시지의 통계를 파악하려면, iOS 및 Android 기기에서 열린 전송 메시지 수와 Android 앱의 '노출수'(사용자에게 표시된 알림) 데이터가 기록된 FCM 보고 대시보드를 확인합니다.


그래서 Launcher 로 등록된 MainAcitivity 가 실행 될 때 받아온 수신 문구를 처리하도록 구성해 주어야 한다. 


    @Override
protected void onStart() {
super.onStart();

Log.e(TAG, "onStart") ;

if (getIntent().getExtras() != null && !sp.getBoolean("FcmTy", false)) {
Bundle bundle = getIntent().getExtras();
Log.e(TAG, "URL=" + bundle.getString("URL"));
Log.e(TAG, "BODY=" + bundle.getString("BODY"));
editor.putString("URL", bundle.getString("URL").contains("http") ? bundle.getString("URL") : "https://" + bundle.getString("URL"));
editor.putString("BODY", bundle.getString("BODY"));
editor.putBoolean("FcmTy", true) ;
editor.commit();
Intent intent1 = new Intent(this, ViewActivity.class);
startActivity(intent1);
finish();
}
}


onCreate 에 하지 않고 onStart 에서 처리 하는 것은 아무래도 activity 의 lifecycle 에 따른 조치라고 볼 수 있을 것 같다.


그럼... 오늘도 즐~


반응형


오늘의 이야기

오늘은 barcode 인식을 이용한 앱 구현에 대한 정리를 해 볼까 한다.    이 기능 구현의 시작은 어느 티비에서 방송했던, 어쩌다 사장  이라는 방송에서 출연진들이  원래 가게 주인이 적어든 가격표를 찾아가면서 판매를 하는 것을 보고, 단순한 바...